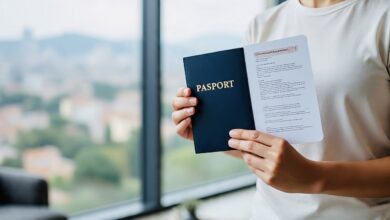
Leaving your country for another country is not easy, especially if you are new to the system. To be able to relocate to Canada, there are certain documents needed.
These documents should be collected several weeks, if not months, before your departure date. Consider printing this article and checking items off as you go.
Documents that are needed before relocating to Canada
Gather all of the original copies of documentation that you and your family will require as you adjust to life in Canada. These documents are about your education, health, profession, and other topics. This will include:
Put your finances in order. How much do you need to bring in for the settlement? This amount varies depending on your immigration status and family size. Research the Government of Canada’s laws on how much money you may carry, as well as the currency rules.
If you bring more than $10,000 CA, you will be obliged to declare it. To accomplish this step, you will need to utilize the cross-border currency or monetary instrument report form.
Do you carry travel insurance? This may seem like an extra expense, but it may be a lifeline if something goes wrong. Don’t forget to look into health insurance for medical coverage once you arrive.
When it comes to driving and vehicle insurance, make sure you have a “no claims” letter to prove your driving record and lower your insurance premiums.
It is critical to ensure that the appropriate people are notified if something goes wrong. Make a list of emergency contacts. This might include your parents, siblings, local acquaintances, and relatives. Email this list to yourself, and print a physical copy for future reference. Do not rely only on your phone in case it is misplaced or runs out of battery.
List of Documents Required for Canada Immigration
Birth certificates for you and your immigrant family members.
If any documents you submit are not in one of Canada’s two official languages, English or French, you must provide original translations and affidavits confirmed by a translator.
How to Apply for Permanent Residence in Canada
First and foremost, you should not undertake something for which you are ineligible. Before you get started, be sure you meet the qualifying requirements. The majority of you will be eligible because the criteria are flexible. For example, you may require a few years of experience, a good command of English, or a college degree. If you are unsure about some of the questions, provide an approximate answer to determine your eligibility.
You must demonstrate your English or French language skills by completing one of the approved tests. We took the IELTS General Training test, which is one of the most common English language tests taken by candidates all around the world. Once you’ve scheduled your test, prepare thoroughly and aim to earn a decent result. An IELTS test comprises four sections: listening, reading, writing, and speaking, each with its cut-off score.
3. Educational Credential Assessment (ECA).
You must have your non-Canadian degrees, diplomas, and certificates assessed by a certified body, such as WES. These organizations evaluate your degrees and transcripts and provide a Canadian equivalent to them. It is crucial to know that a Master’s degree earned in your native country may not be regarded as equal to a Master’s degree in Canada. This will immediately affect your CRS score. Different agencies may give different evaluations, and their charges as well as timelines may also be different.
Ask around and study up on the numerous authorized groups to find one that works for you. For the assessment, you will need to request your transcripts in sealed envelopes from your college or university and have them shipped to WES Canada. WES will usually send you the results within a month.
4. Create an Express Entry profile.
Create your Express Entry profile on the IRCC website after receiving your language test scores, ECA, and NOC code. Based on the answers you submitted, you will be assigned a score and placed in a pool with other applicants. Every few weeks, IRCC performs a draw from this pool to choose a certain number of candidates who score higher than a particular cutoff. The number of candidates and cut-off scores fluctuate with each draw. Congratulations; if your score matches or exceeds the cut-off score for the next draw, you will be invited to apply. If your CRS score is less than the cut-off score for that draw, you will have to wait in the pool until the cut-off score is low enough.
If your CRS score is higher than the cut-off, you will get an official Invitation to Apply (ITA) on your Express Entry account. Obtaining an ITA is the most difficult aspect for most candidates, and the vast majority of them never reach this level. If you have been granted an ITA, you are almost certain to become a permanent resident of Canada, unless you misrepresented anything in your profile or documents, or something changes that makes you ineligible to apply for PR.
With your ITA, you will be required to submit a few documents online to support the claims you made in your Express Entry profile. For example, your IELTS report or evidence of age, in addition to police verification and a medical assessment. You will have 60 days to submit all of your documentation; otherwise, you will forfeit this opportunity. If you do not submit your application within that time frame, you will have to wait until the next draw, which may have a higher cut-off score than your CRS score. When you submit your application, IRCC will send you an acknowledgement of receipt (AOR) within roughly a day. This implies that IRCC has successfully received your application and will begin working on it soon.
If your application is granted, congratulations! You are practically a Canadian permanent resident now! Your local visa office will send you a letter confirming your PR status (COPR). Depending on your place of origin, you may be eligible for a one-time PR entry visa. Now, start planning for your arrival in Canada. Your PR visa will have an expiry date, and you must arrive in Canada before that date. This date is typically 365 days after your medical exam date.
You will be quite busy planning to relocate, and you should begin as soon as you receive your COPR – there is a lot to do! When you arrive in Canada, your passport and COPR will be stamped, and you will officially become a Permanent Resident. It is critical to ensure that you have not misrepresented anything; otherwise, your COPR may be refused upon your arrival. Now leave the airport and give yourself a pat on the back because you have accomplished something that will alter your life forever.
In conclusion, the essential documents for your travel to Canada were listed in this post. If you are not certain about how to apply for a visa, consult with an immigration lawyer to help you prepare the documents for your Canadian immigration process.


